I haven't updated in ages so... just an explanation!
I got my a level results the other day. I got A*A*A + an A* for the extended project. I'm not happy about that A, but I've made my offer. I'm especially happy about being awarded full marks for my extended project because I worked SO. HARD. on it. I wrote it on whether prostitution should be legalised, and I actually started with the belief that it should be. That changed when I actually did some research, and I'm so happy I did. It has completely changed my perspective on the issue. JUST SAYING. I wish I could post my discussion on here for you to read but... I can't quite bring myself to re-read it haha
So anyway, that means I made my offer to study Law at my first choice university - Durham (Van Mildert)! I'm so happy! So happy! I've spent the past couple of weeks filling in all my forms (I still have one left), reading as much as I can and generally trying to get my shit together. Because my parents are leaving the country (well, my dad has already left as of two days ago) and my boyfriend and other Sussex students will be taking over the house, we have to move out. Oh, and I randomly went to Cardiff for a couple of days.
My sewing machine is still out, and I will bring it with me to uni, so the tutorials will continue. I will do the second button-down tutorial today or tomorrow! Anyway, just thought I would post an explanation / life update.
Bye!
x

Goodness gracious me
13.8.11

What you need...

About 3m of medium - heavy weight fabric and 3m of lining fabric (depends on how long you want it to be), about .5m (maybe more) of another fabric for the collar if you want, about 1m of interfacing, sewing machine, pins, tape measure, seam ripper if you have one.
What you must do...
1. Cut out your pieces
1. Cut out your pieces
When I say 'cut x 2', you must also cut x 2 of your lining fabric. The length of the diagrams is not the length I think the actual pieces should be! I have not measured the length as it is completely up to you and makes no difference to how the coat is put together. It might help to draw these pieces on paper beforehand (art paper / baking paper / butcher paper, whatever). This would enable you to get a better idea of the size of the pieces without cutting into your fabric first, just in case you make a mistake. If not, it doesn't matter, just be a little more careful, and remember that it's better to make things too big than too small.
----------------------------------------

When cutting your main fabric, include the shaded area. When cutting your lining fabric, stop at the yellow line (add a couple of cm for a seam allowance). Also, with seam allowance, cut two of the shaded part only out of both your main fabric and interfacing.
A:
From your shoulder to the bottom of the armhole. Don't make this too small! Mine was about 30cm
B:
Plus seam allowance, from the collar to your shoulder. You could make this longer, depends on what you like. Mine was about 13cm
C:
This depends on how wide you want your lapel to be. The whole piece should be wider if you want a double-breasted coat, 23cm
d = 14cm (top to bottom)
-------------------------------------------------

Cut one on the fold. For your lining fabric, the fold should be at the yellow line - the main fabric will have a pleat at the back but the lining will not!
A:
Same length as the (B) above!
B:
This is the neck. Mine was about 11.5cm.
C:
About the same as (A) above.
-------------------------------------------------

A:
56cm
B:
9cm
It's really up to you, though, and also depends on how wide you cut your front piece. Keeping in mind the fact that it will look smaller when all sewn together, pin this piece to your front piece to see how it looks! If it's too big, trim it. If it's too small, you can always trim down the front pieces a little (:
-------------------------------------------------

A:
must match the armholes, but it's an easy fix if you get it slightly off (as you will see when you sew the sleeves on)! Mine was about 30cm. Once again, how long / wide / tapered the sleeves are is totally up to you.
-------------------------------------------------
2. Sew

Right sides together, sew the shoulders of the back piece (A above) to the shoulders of each front piece (B) above. Take the little piece you cut from the shaded bit above (front diagram) and sew it to the front piece you cut from the lining fabric, attaching interfacing to it in the process. You should end up with a lining piece to match the front piece made from the main fabric. Sew the front + back lining together in the same way.

Along the yellow line in the diagram for the back, right sides together, sew one line of stitching. Use the longest possible stitch on your sewing machine for this (or hand sew), but go over the top inch or so with a normal stitch. You do not need to do this step to the lining fabric.

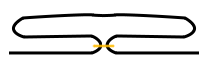
It's a little hard to see on my fabric, but opening up the back piece to lie flat, iron the fabric you've sewn. As you iron, keep making sure that the stitching is in the middle. About an inch from the top, stitch over the fold a couple of times to reinforce the area where the pleat will end.

Unpick the long stitches! You should now have a pretty pleat.

Right sides together, sew the side edges of each sleeve piece together, and again with the lining fabric.

Turn the 'body' of the coat inside out, so the right sides of both the front and back pieces are together. Matching up the bottom of the armhole on both back and front pieces, sew from that point to the bottom of the coat, and repeat on the other side. Where both pieces have just been joined together, at the bottom of the armhole on one side, match this up with the seam (the bottom) on one sleeve. As always, right sides together! Sew from this point all around the sleeve / armhole, so they are joined together. Repeat with the other armhole / sleeve and do the same with the lining fabric. You should now have two coat-like things, one in your main fabric and one in your lining fabric.

Eeeeeven though I've divided one side of my collar into two, you don't need to do that. I mean, you can if you want but it's not necessary. It means you can secure your interfacing down the center if you want. Anyway, sew your interfacing to one of your collar pieces, either into the two underside pieces when you join them together, or basted around the edges.

Right sides together, sew both collar pieces together along the widest edge, then down the sides. Cut the corners and turn inside out.

Right side of the main fabric against the underside of the collar, sew together at the neck edge. Make sure the collar is perfectly in the middle.

Do the same with the lining fabric so the collar is now anchored between both sides. Unfortunately I didn't photograph this part but... turn the coat inside out so the wrong sides of the main fabric and lining are facing outwards, and sew along both outer edges (i.e. the edge where both sides of the front meet when you put the coat on... THE FRONT SIDE EDGES. I'm terrible at explaining things). Clip the corners and turn the coat the right way round again. Iron (+ maybe stitch over the top if you feel you need to)! The only exposed edges now should be the ends of the sleeves and the bottom of the coat.

Get a hold of the sleeves and match up the seams on both the lining and main fabric. With the right sides together, sew the lining and main fabric together at the end of the sleeve. When you turn it the right way again, you should have something like the above picture!

Your lining should be shorter than your main fabric so... trim it a bit if necessary. All you really need to do now is hem both the lining and main fabric. You could, if you wanted, turn the whole thing inside out and actually sew the lining to the main fabric at the bottom (leaving a little gap to turn it out the right way again and hand sew closed), but I'm not going to do that.


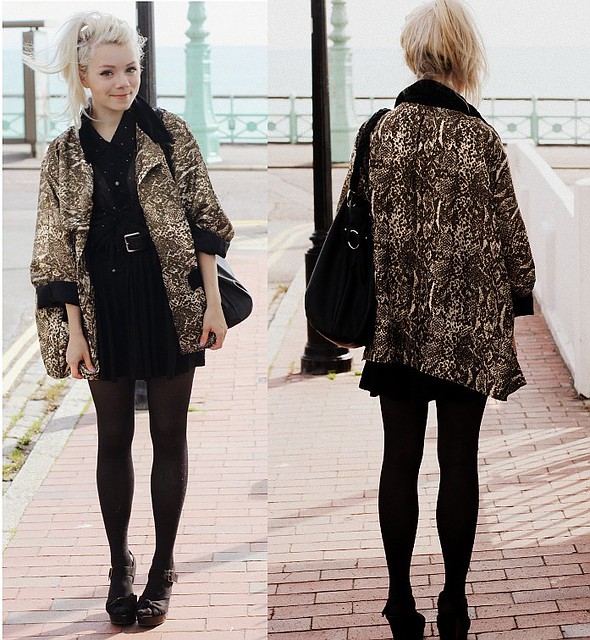
So... now the outfit I wore with it hoho. As you can see, I actually ended up adding pockets. I did this the day afterwards and didn't photograph it - I'm sorry!
Bye everyone!
4.8.11
... is at the bottom of the page after the jump. Unlike on livejournal, apparently you can't have text after the cut but still outside it! Hmm! Well here are some pictures of my non-scary week. I wish I took my camera around with me more but I just don't! Sheem.


We went to Cheddar Gorge! It was amazing. I took loads of photos but unfortunately most of them are a bit blurry as the light was so low in the caves.


 We also went to Wells, where they filmed Hot Fuzz. It was so pretty and there was a choir practicing in the cathedral when we went inside which, as I'm sure most of you will agree, is always a bit of a tear-inducing experience. We also went into this really nice cafe called Coffee#1. They do hot apple and cinnamon, one of my favourite drinks and actually not too easy to find (AMT coffee does it too, randomly) as well as things like hot chocolate with coconut. We were impressed. But anyway...


These were taken on one of our many walks. No pictures of me because we were going to the woods where there are zillions of stinging nettles and I didn't bring any trousers with me hoho. I looked bizarre in the end. Actually, I didn't bring loads of things with me e.g. shoes without holes, tampons, toothbrush, contact lens solution... I had to got to Asda and buy all these things the day after I arrived because I was so disorganised haha.

 Plus here are two old photos from Andy's mother's wedding that I decided to upload because they have some stylish ladies in them. Makes me excited for winter so I can get out my fur coat. And speaking of coats...
 I made this coat today! It was a bit of an experiment but as it succeeded, I'll make a tutorial for it when I get some new fabric (: but maybe with a couple of modifications. I feel like making loads of them haha. I might end up with a wardrobe full of coats. Anyway, here is my scary story. Sorry it's so poorly written!

I love these blended ice things. They have pretty much the same at Starbucks except they don't have peach flavour which is... the best flavour. Tasty tasty tasty


We went to Cheddar Gorge! It was amazing. I took loads of photos but unfortunately most of them are a bit blurry as the light was so low in the caves.


These were taken on one of our many walks. No pictures of me because we were going to the woods where there are zillions of stinging nettles and I didn't bring any trousers with me hoho. I looked bizarre in the end. Actually, I didn't bring loads of things with me e.g. shoes without holes, tampons, toothbrush, contact lens solution... I had to got to Asda and buy all these things the day after I arrived because I was so disorganised haha.


