
I only got back a couple of days ago so have been a bit too tired to do any hefty (even moderately so) sewing projects. I've done a mini-tutorial for a scrunchie a la Heathers because its easy. First, however, I will post some photos I took over the past week. I was staying with my boyfriend (Andy) at his parents' dairy farm in Wiltshire. The calves were let out into the sunshine that week so I'm so frustrated I didn't get any photos of them! They were all tufty and sweet hoho.

 |
| We went for a long walk at this... place. I don't know what it was called or where it was, just that it was very pretty / there were stinging nettles bloody everywhere |


 |
| Am I the only one who finds this weirdly Blair Witch Project-esque? |
 |
| We decided to get a ROAST because it was Sunday and as luck would have it, we ended up having the greatest carvery ever. The table wasn't actually reserved for us or anyone else (I think) so idk why it says that but THE POTATOES WERE INCREDIBLE. |
 |
| Then Andy made me a fancy coffee when we got back. Fancy in so far as the equipment was fancy and it had foam but wasn't out of a machine. I was impressed. |
 |
| Weird aeropress gif |


 |
| I don't even remember what day this was from BUT just FYI, this is a man made hill. Nobody knows for sure what it is for / why it was made but it is enormous. I don't know why I am telling you this, readers of my blog, but I am. |

 |
| More walks around various places. |

 |
| AND WE MADE A ROAST OF OUR OWN. It was amazing. I tried to do closeups of the chicken (the best bit) but it looked a bit gruesome so you shall have to imagine its crispy/tenderness for yourselves. --------------------------------------------------------------------------- |

What you will need...
Sewing machine / needle and thread
A small-ish amount of red fabric. Maybe use an old shirt or something?
Elastic

What you must do...
Cut your elastic according to how thick your hair is / how big you want your scrunchie to be. I believe mine was 9 inches.
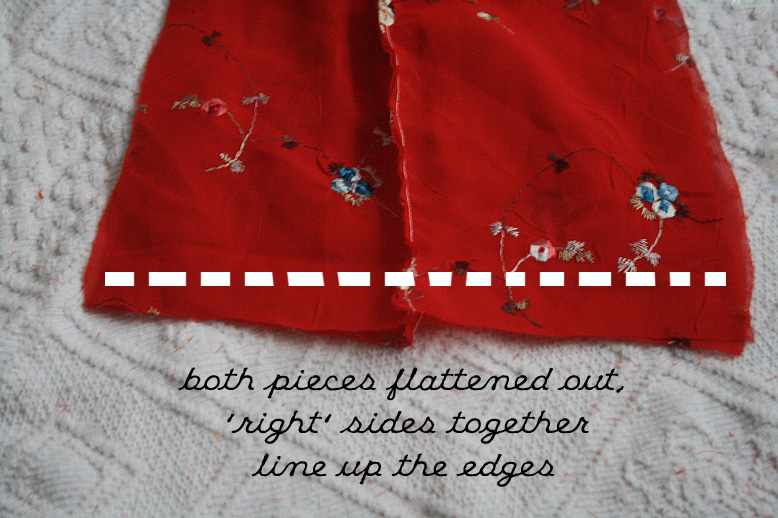
For the fabric covering, you will need to cut a rectangle shape. The length should be more than double that of the elastic (so approx 22" for me) and the width double how much you want it to eventually turn out like (the width of mine was about 2.5" in the end so I would need to cut a bit more than 5").
You don't really need to measure it, just cut a long rectangle more than double the elastic in length and however thick you want the scrunchie to be x2 in width.

Fold the rectangle in half and sew along one side

Sew one end of your elastic to one end (along the stitched side)

From that point, sew down to the other corner.


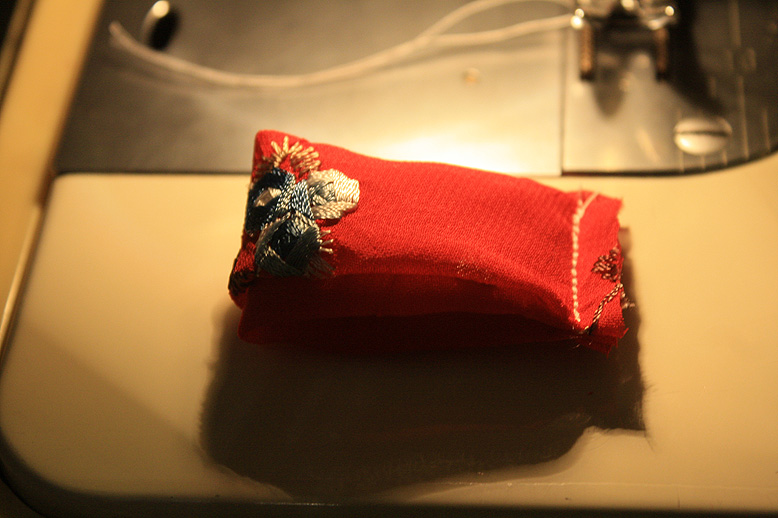
Turn it inside out and it should now look more or less like the bottom picture hoho
For some reason I didn't photograph this bit properly but now you have to get the elastic from inside (it should be inside now that you have turned it inside out) and pull it out of the opening to meet the other side. Sew it in place like you did on the other side! In hind sight (sorry I didn't plan this very well) you could've sewn it to the other side before turning it inside out... BUT ANYWAY

It should vaguely look like this - stitched down at the open end.

It gets a bit hard to photograph from this point. Turn the ends of the open side inwards about 1cm.

Fit the open side (with edges turned in) over the sewn up other side of the tube. You may or may not want to pin it. Pinning can sometimes make fiddly things even more fiddly, but it's up to you.#

Sew down the folded over part through all layers of fabric. You could handsew it so you keep the 'tube' and so you don't have a visible row of stitching, but I can't be arsed.


Cut four of this shape! It's hard to tell you how long they should be really, but mine was about 16" long. The width depends on how fat you want your bow to be. Mine was about 4" wide. The angle of the 'tail' also depends on your personal taste, obviously! Each piece will be half the length of the entire 'ribbon', so keep that in mind. Put two of the pieces together (right sides facing inward, wrong sides facing outward) and stitch along the orange dotted line. Now do this for the other two pieces.
Excuse the weird picture. I haven't ironed anything haha. Open up the joined pieces so they are lying flat with the stitching facing upwards. Place the two pieces together with wrong sides inward and right sides outward, lining up the flat edge on both pieces. Don't worry if they've ended up slightly uneven, just give it a trim. Sew along the flat edge (the dotted line in the picture).

You should now have something which vaguely looks like this?

Fold it in half (right side inward, wrong side outward) and stitch along the dotted line but leave a space (about 2cm?) in your stitching at some point. It doesn't really matter where, but I left the space in the centre. Through this hole, turn the whole thing inside out. Depending on where the whole is and how big it is, you can choose either to leave it or handsew it up (see the slipstitch on this page)

Arrange your ribbon into a vague bow shape that you like. Pin where you want everything to go.

Sew it all down :D


Get a little bit of fabric (about 4" x 2"), fold it in half and stitch along the longer side. Turn it inside out.

Make a little pleat, fold it in half, stitch, trim the end. You should now have a little loop.

Sew your loop to the scrunchie along the seam. Sew through the elastic as wellll. Get both sides of the loop and stitch it to the fabric of the scrunchie so it sits relatively flat. The line of stitching in the above picture should now be hidden.

Get your bow, push it through the loop, arrange and adjust so it looks nice, use a needle and thread to stitch it to the loop. Now you've finished, hooray.


I'm gonna make it today. : )
ReplyDeleteYou're pretty as usual.
GAH you're photos are stunning and that place looks byootiful and your roast looks so good! maybe i'll be lucky enough to spend a beautiful day with you if i ever study abroad in europe!
ReplyDeleteand your tutorial is so indepth! i have never laid hands on a sewing machine before, but your blog makes me want to every time i visit. grrr...
Gorgeous photos of you and the countryside! Love the scrunchie! It has a more upbeat/modern twist when you wear it.
ReplyDeleteAww, thank you schwurlie! :)
ReplyDeleteI really enjoy reading your blog btw! I think you're very pretty and cute.
Thankyou everyone <3 :D
ReplyDeleteI love this, too!
ReplyDeleteAhah, tomorrow is gonna be my sewing-day! <3